Character creation
Character Rigging for Virtual Reality
We can consider the character rig as the link that connects the modeling phase with the animation phase. The rig, in fact, is the construction of a specific “skeleton”...
We can consider the character rig as the link that connects the modeling phase with the animation phase. The rig, in fact, is the construction of a specific “skeleton”...
As we have already seen here, texturing allows us to tell part of the story without disturbing the screenwriters. By using small visual clues, it is possible to communicate...
Most of the production phases in a 3D project involve a moment of research and reference studying. Character artists look for images that they will use to identify the proportions...
How much history can a detail reveal? I think my work as a texture artist can be summed up in this one question. Texturing is not just the application of color to a 3-D model, it...
How important are hairstyles in defining the ages of characters, their ages and their cultures? There is only one answer to this question: a lot. Probably, if we had not decided...
The focus of our VR experience is definitely the human relationship. Time, in ‘Vajont’, passes in the presence of characters who, for the whole duration of the piece,...
We can consider the character rig as the link that connects the modeling phase with the animation phase. The rig, in fact, is the construction of a specific “skeleton” inside the mesh of the 3D object, which allows the animator to manage its deformations.
Although this introduction makes rigging look like something simple and mechanical, it isn’t. A rigger requires a lot of technique to handle all the possible deformations that a 3D asset can undergo, and needs an artistic eye to make the deformations as fluid and natural as possible.
Let me be clearer, with an example: most of us have a limb composed of a hand, forearm, arm and shoulder. The simple action of “bending the arm” is allowed by the presence of a hinge, in our case, the elbow, and by agonist and antagonist muscles, which contract and release. In other words, they deform.
And this is where the artistic eye of the rigger intervenes: understanding the mode and the deformations to which the elements on stage are subjected is the first step towards realism.
As you have already read here and there in this blog, there is a substantial difference between what is produced – in terms of modeling, texturing, and, consequently, rigging – for offline rendering engines and what is produced for online rendering engines.
I’ve already addressed the substantial differences between these two types of rendering engines in the article dedicated to the creation of hair for a VR project, but for more clarity, I’ll mention them below.
Offline rendering engines (those used for movies and cartoons, for example) render each frame in a time that can vary from a handful of minutes to, probably, hours. The frames obtained are only subsequently mounted in 25 fps sequences.
Since this is a type of use that privileges quality over performance, in addition to having on-stage 3D objects composed of very dense and complex geometries, they have many specific deformation tools available for the management of the various movements: latex, clusters, tension, wrap, twist, and jiggle are just a few of them.
Online rendering engines – mainly used for videogames and Virtual Reality – work in the opposite way: as the name suggests, they render each frame in real-time, privileging performance over visual quality.
It follows the need to optimize the data flow to avoid a dropdown of the framerate: very light geometries and textures go hand-in-hand with a simplified rig, without specific deformation tools.
So how do you get a good quality rig – as required by a project like Vajont – even if you have to use a simplified rig system?
Since the deformation of the mesh occurs following the topology of the 3D model – i.e. the organization and distribution of the polygons that define the shape of each object – the first step is to make sure that everything is correct and optimized.
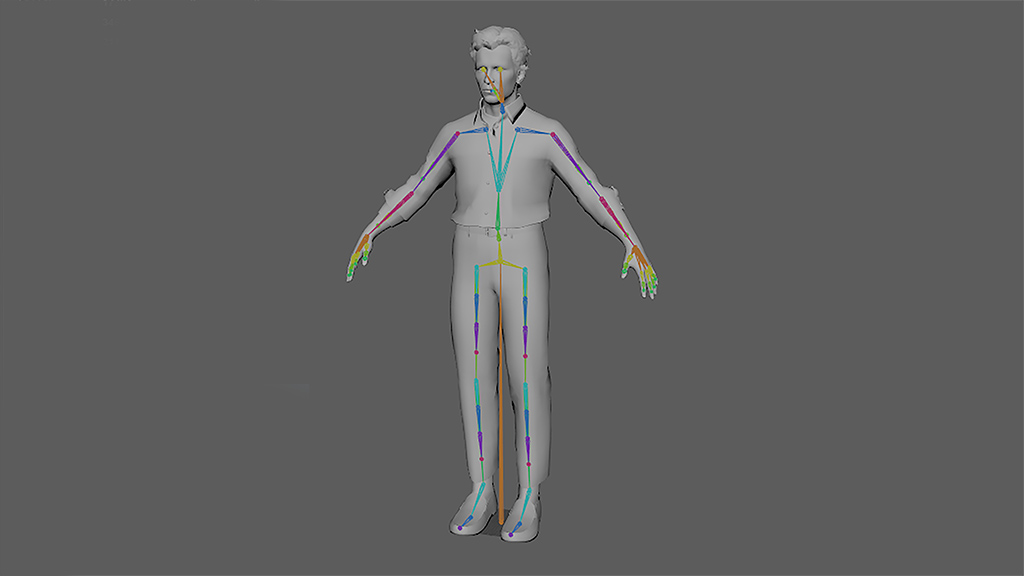
Next, we move on to the positioning of the bones within the mesh. Each virtual bone has a joint, a sort of pivot that indicates the different directions in which the bone itself can be rotated.
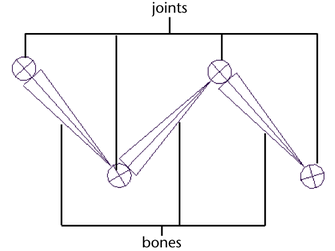
Joints and bones. Image taken from the Autodesk Maya website for educational purposes only.
Virtual joints are placed in positions corresponding with the real ones – some examples are the wrist, elbow, shoulder, neck, knee, etc. If necessary, the rotation of the joints can be limited to certain axes and for a certain number of degrees: for example, the rotation of the head is only on the right/left, high/low axes with rotation angles that hardly exceed 180°.
In this regard, it is important that each joint is correctly oriented, in order to have a process that is as standardized as possible.

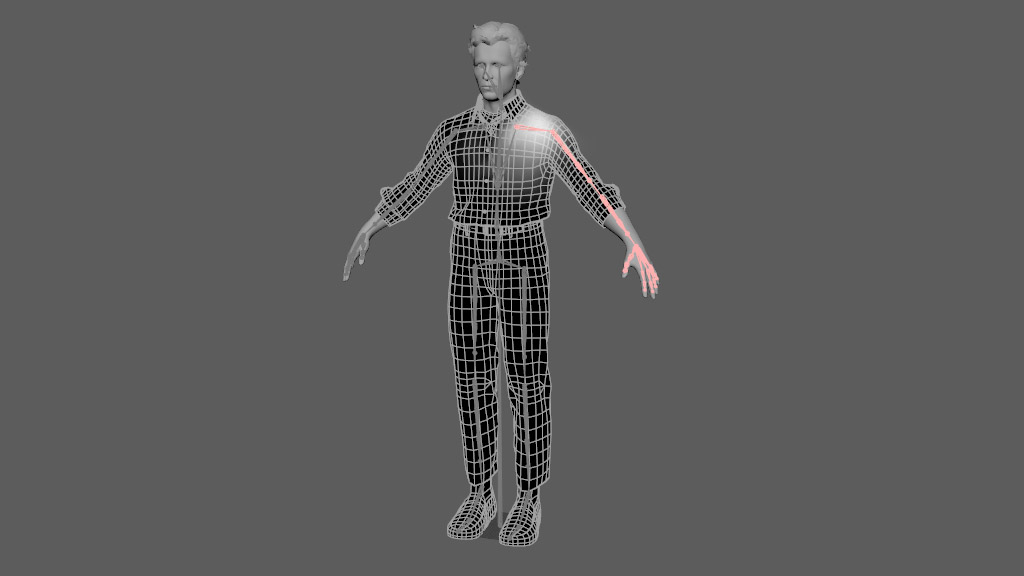
Let’s take a little step back. Bend your elbow until you draw an angle of about 90 degrees between your upper arm and forearm. You got it? Good. Start rotating your wrist, looking closely at what’s happening to the skin on your forearm. What can you see?
I’ll give you a small clue: the part of the forearm closest to the wrist rotates more than the part closest to the elbow. This movement is the result of the crossing of the radius and ulna, the two bones of the forearm.
How was it possible to transfer this effect to our 3D model?
Actually, the process is simpler than it looks.

Between elbow and wrist, I inserted a series of three different joints, applying mathematical functions to them, in order to simulate the skin slipping that takes place in reality. This little trick allowed me to recreate a rotation that was fluid and gradual.
We should not forget that the rig is made to be used by an animator. Consequently, we must not underestimate the importance of usability! We cannot ask the animator to move every single bone to carry out an animation. The realization times would triple, and the labor involved would jeopardize any guarantee of an enjoyable or natural result.
Therefore, we need to add controls.
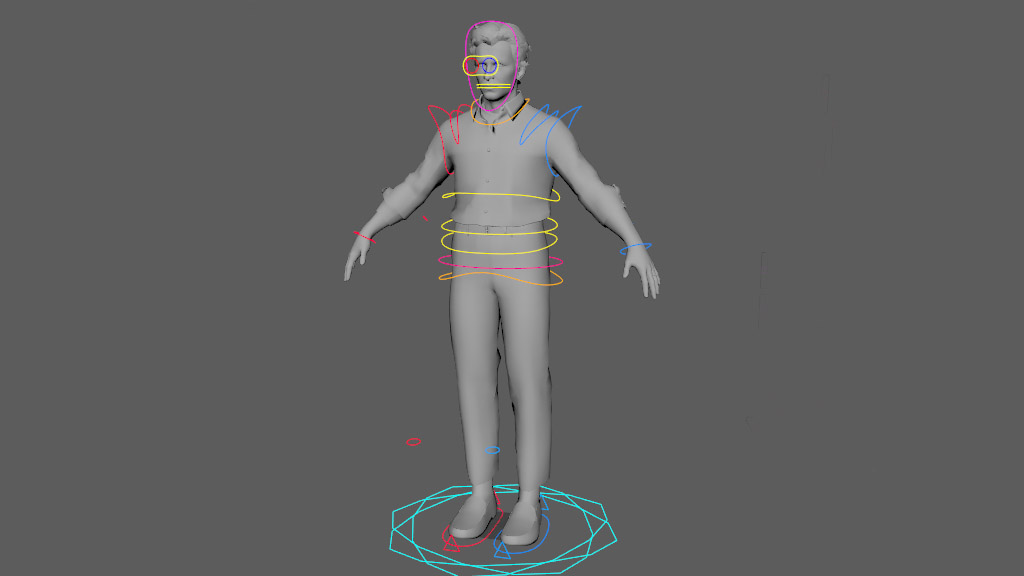
Basically, controls are shapes to which are attached – through proper ‘constraints’ – bone and joint systems. These controls would make it easy to manage the rotation and translation of each group of bones to which they refer.
For those groups of bones and joints that are too close together and where the controls on the model would risk overlapping – as is the case for the phalanges of the fingers – external panels are built while always respecting usability.
Now it’s time to connect the 3D mesh to the bones we placed inside it. This process is called skin-binding: once the ‘skin’ is attached to the bone and joint systems, the movement of the bone coincides with the movement of a part of the geometry.
We then move onto the weight painting phase, which allows us to precisely define the areas of influence of each joint on the 3D mesh.
The weighing is precisely ‘painted’ on the mesh using a special brush. As you can see in the picture, the white areas define the areas of influence of the joint; the further away from the joint, the more the area of influence fades. To help us better visualize this step, we can think that moving the shoulder will still have a minimal influence on the chest and arm.
Did you also move your shoulder to see how it affects the rest of your body?
Well, this will make the importance of painting the weight even clearer for you.
We can think of blendshapes as different versions of a single model: this is one of the possible techniques that could be used for the facial rig.
Each blendshape corresponds to a different expression of the same face, meaning we will have a different 3D mesh for anger, joy, sadness, etc.
Including the different position of the lips and cheeks for the pronunciation of each phoneme, Vajont’s characters have 68 facial blendshapes each. We will trace the expressiveness of the actors who gave them voice and motion-capture to provide an even more realistic final look.
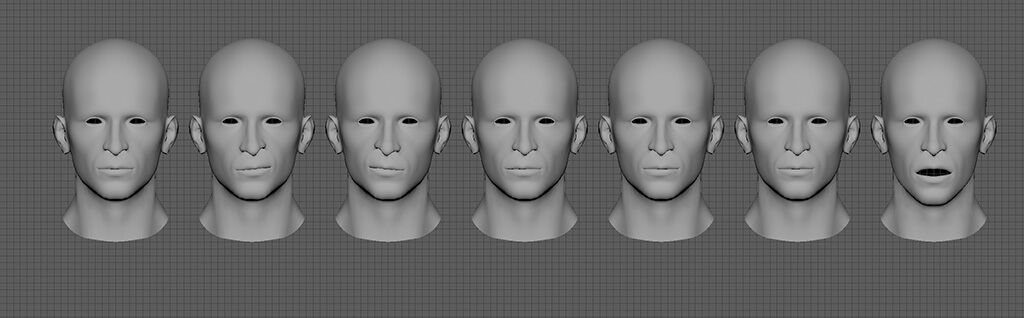
A group of blendshapes made for her husband’s character. You can see the different positions of the mouth.
The blendshapes are therefore integrated into the rig. In our specific case, we have written a customized system, and it is so vast that it does not fit within a single screenshot!
In this case, a control panel has also been created to allow the animator easier use of the system.
The character, now rigged, is then delivered to the animator. The latter, through a system of keys, records the position of each control over time. The animation is then baked (fixed, stored) directly onto the bones, allowing us to import a light and optimized file into Unity, without controls and any further data.
For characters whose animation is not created by the animator, but dynamically managed by the system, the command ‘bake deformation to skin weight’ allows us to transfer the information relating to the deformation to the skin weight file. In this way, moving the bone in Unity will move the portion of the mesh.
Comments